I cobbled this together today from my original snap on top chest — a KRA-59G I bought in 1989 — a crappy set of 3 drawers I picked up somewhere for free years ago and a cheap metal cart which I adapted to use in my move.
It’s actually two carts made into one, now it’s chopped and drilled to make a service cart of sorts.
It’s a little rough but working with what I had I think it works and looks just fine.
Hey you might not be able to afford a Rubicon or a classic CJ, but in Ohio we don’t let that shit bother us. No sir. You go down the local recyclers grab whatever the hell car they have that still starts, get a temp tag, remove the doors and live that sweet Jeep life!
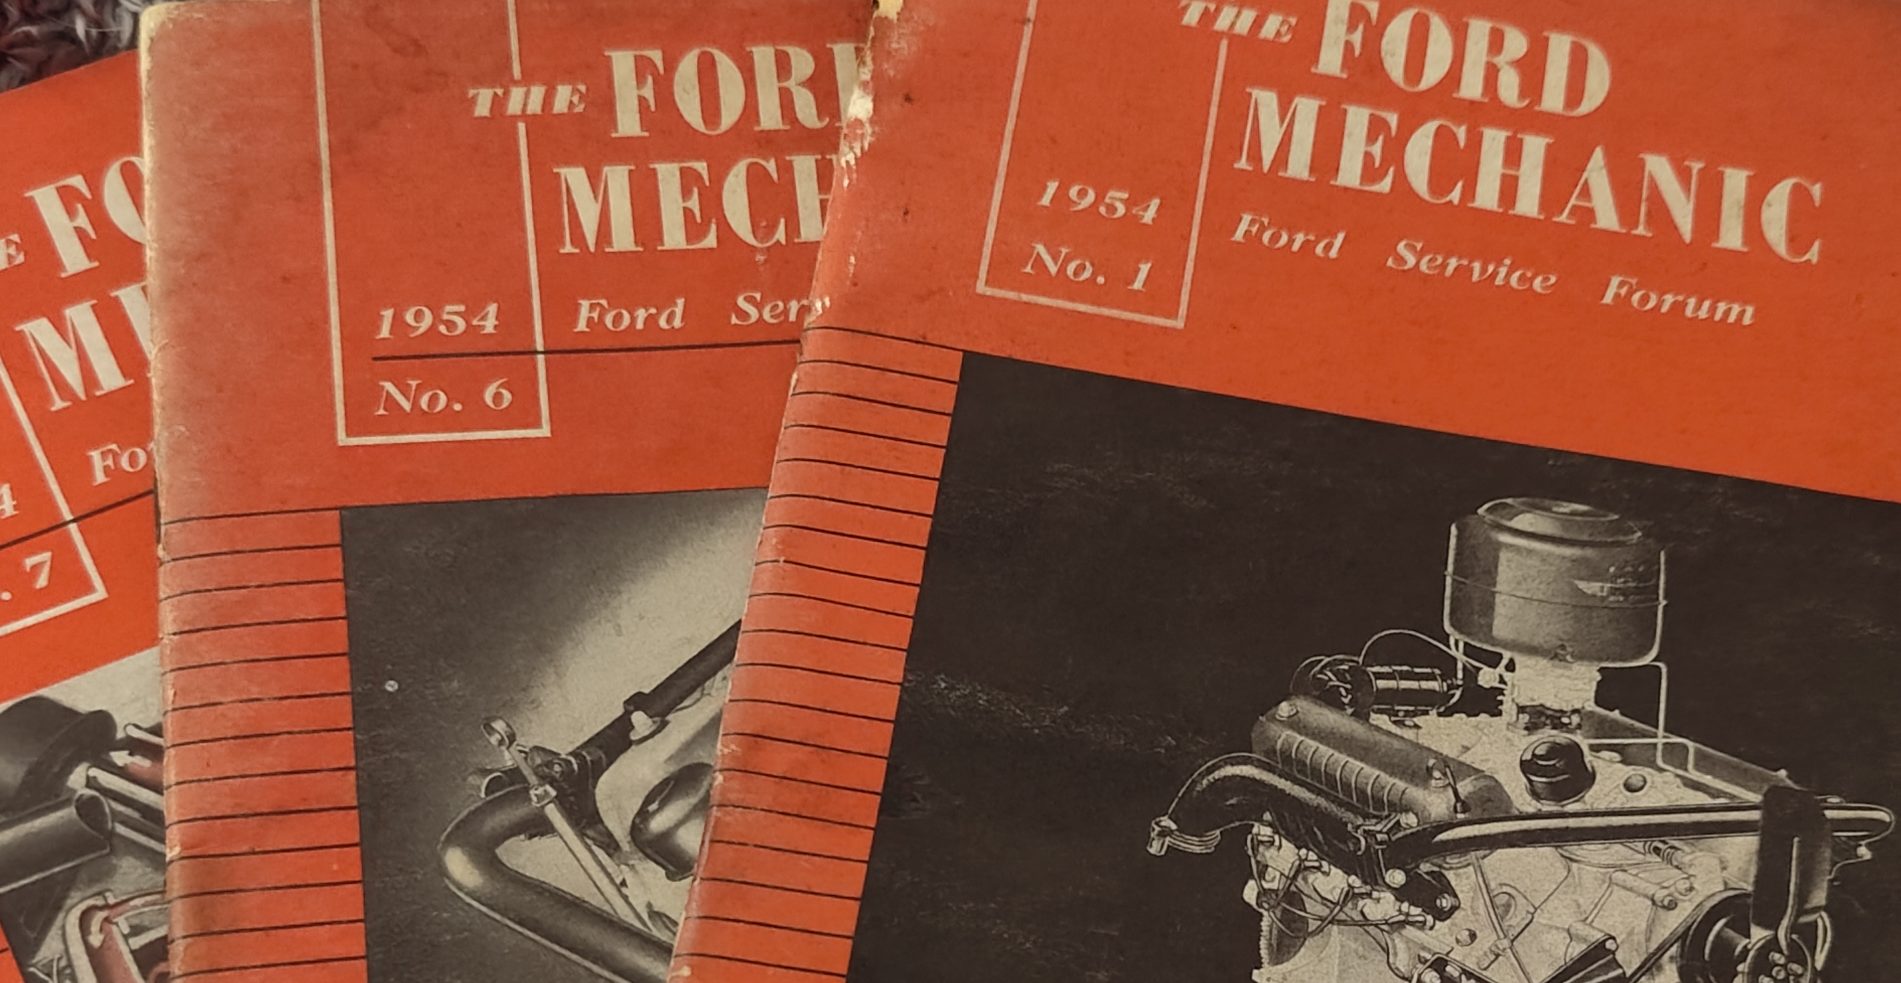
Rooting through a salvage yard can turn up all kinds of treasures — and a lot of junk quite honestly — but this time I did find something interesting; Ford service books from 1954 with some great information about engines and service from that era.
Flicking through the first one I found a great section discussing Volumetric Efficiency.
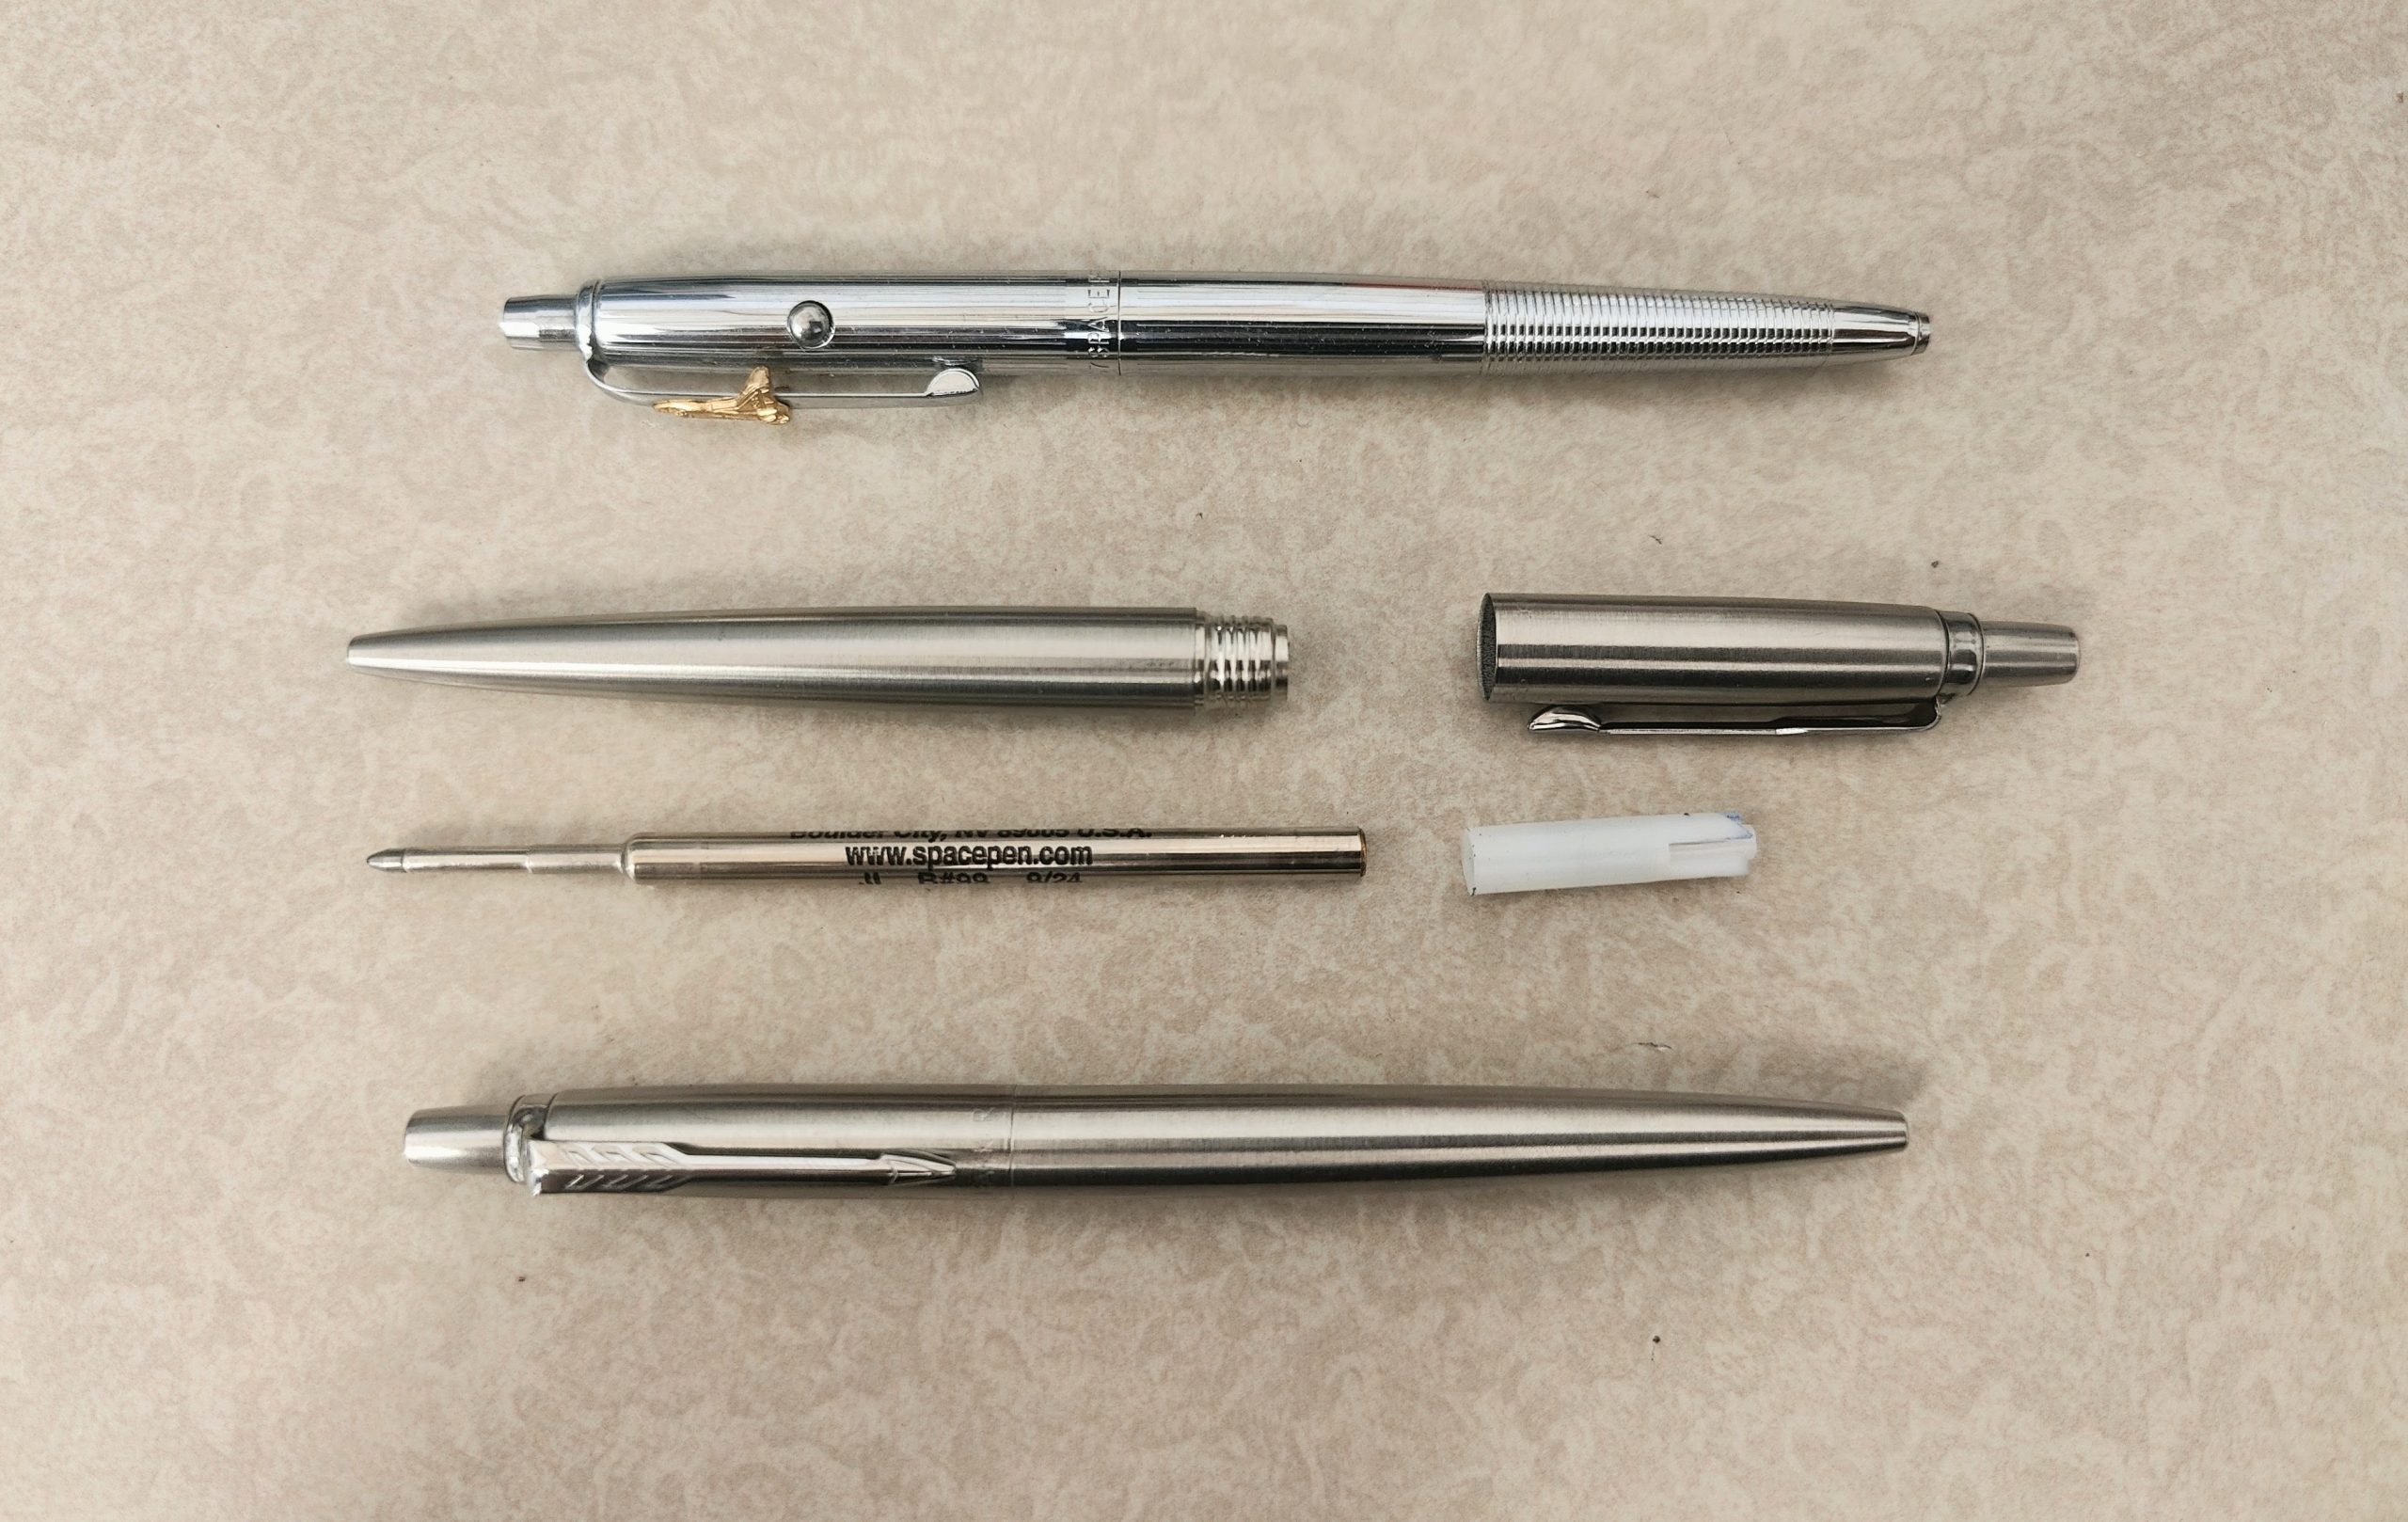
I’m a big fan of the Parker Jotter, always have been, it’s probably the most practical and yet elegant pen ever made — my opinion — I’ve owned and lost hundreds of them in my lifetime.
I’ve even bought some newer versions of it but always came back to the original incarnation. Nothing weird there so far, I guess..
But when I first heard of the Fisher Space Pen I was hooked and had to get one. It was then I noticed something great. Something that I did not know. When I bought my first Fisher Space Pen refill it came with a little plastic topper. My mind was blown; this was to convert your Parker Jotter to a Space Pen in seconds.
Pop on that plastic piece which is shaped just like the Parker refill for the ultimate Space Pen experience in your favourite Parker Jotter. Who knew!? Who didn’t know!? And do many people even care?
But anytime I tell someone this — and I pick and choose the person I tell, it must be someone who’d be interested in design and/or engineering — their mind is blown too.
Having recently moved and even more recently — finally — receiving my shipment of tools, I’ve been doing a clear-out and re-organisation of all my equipment.
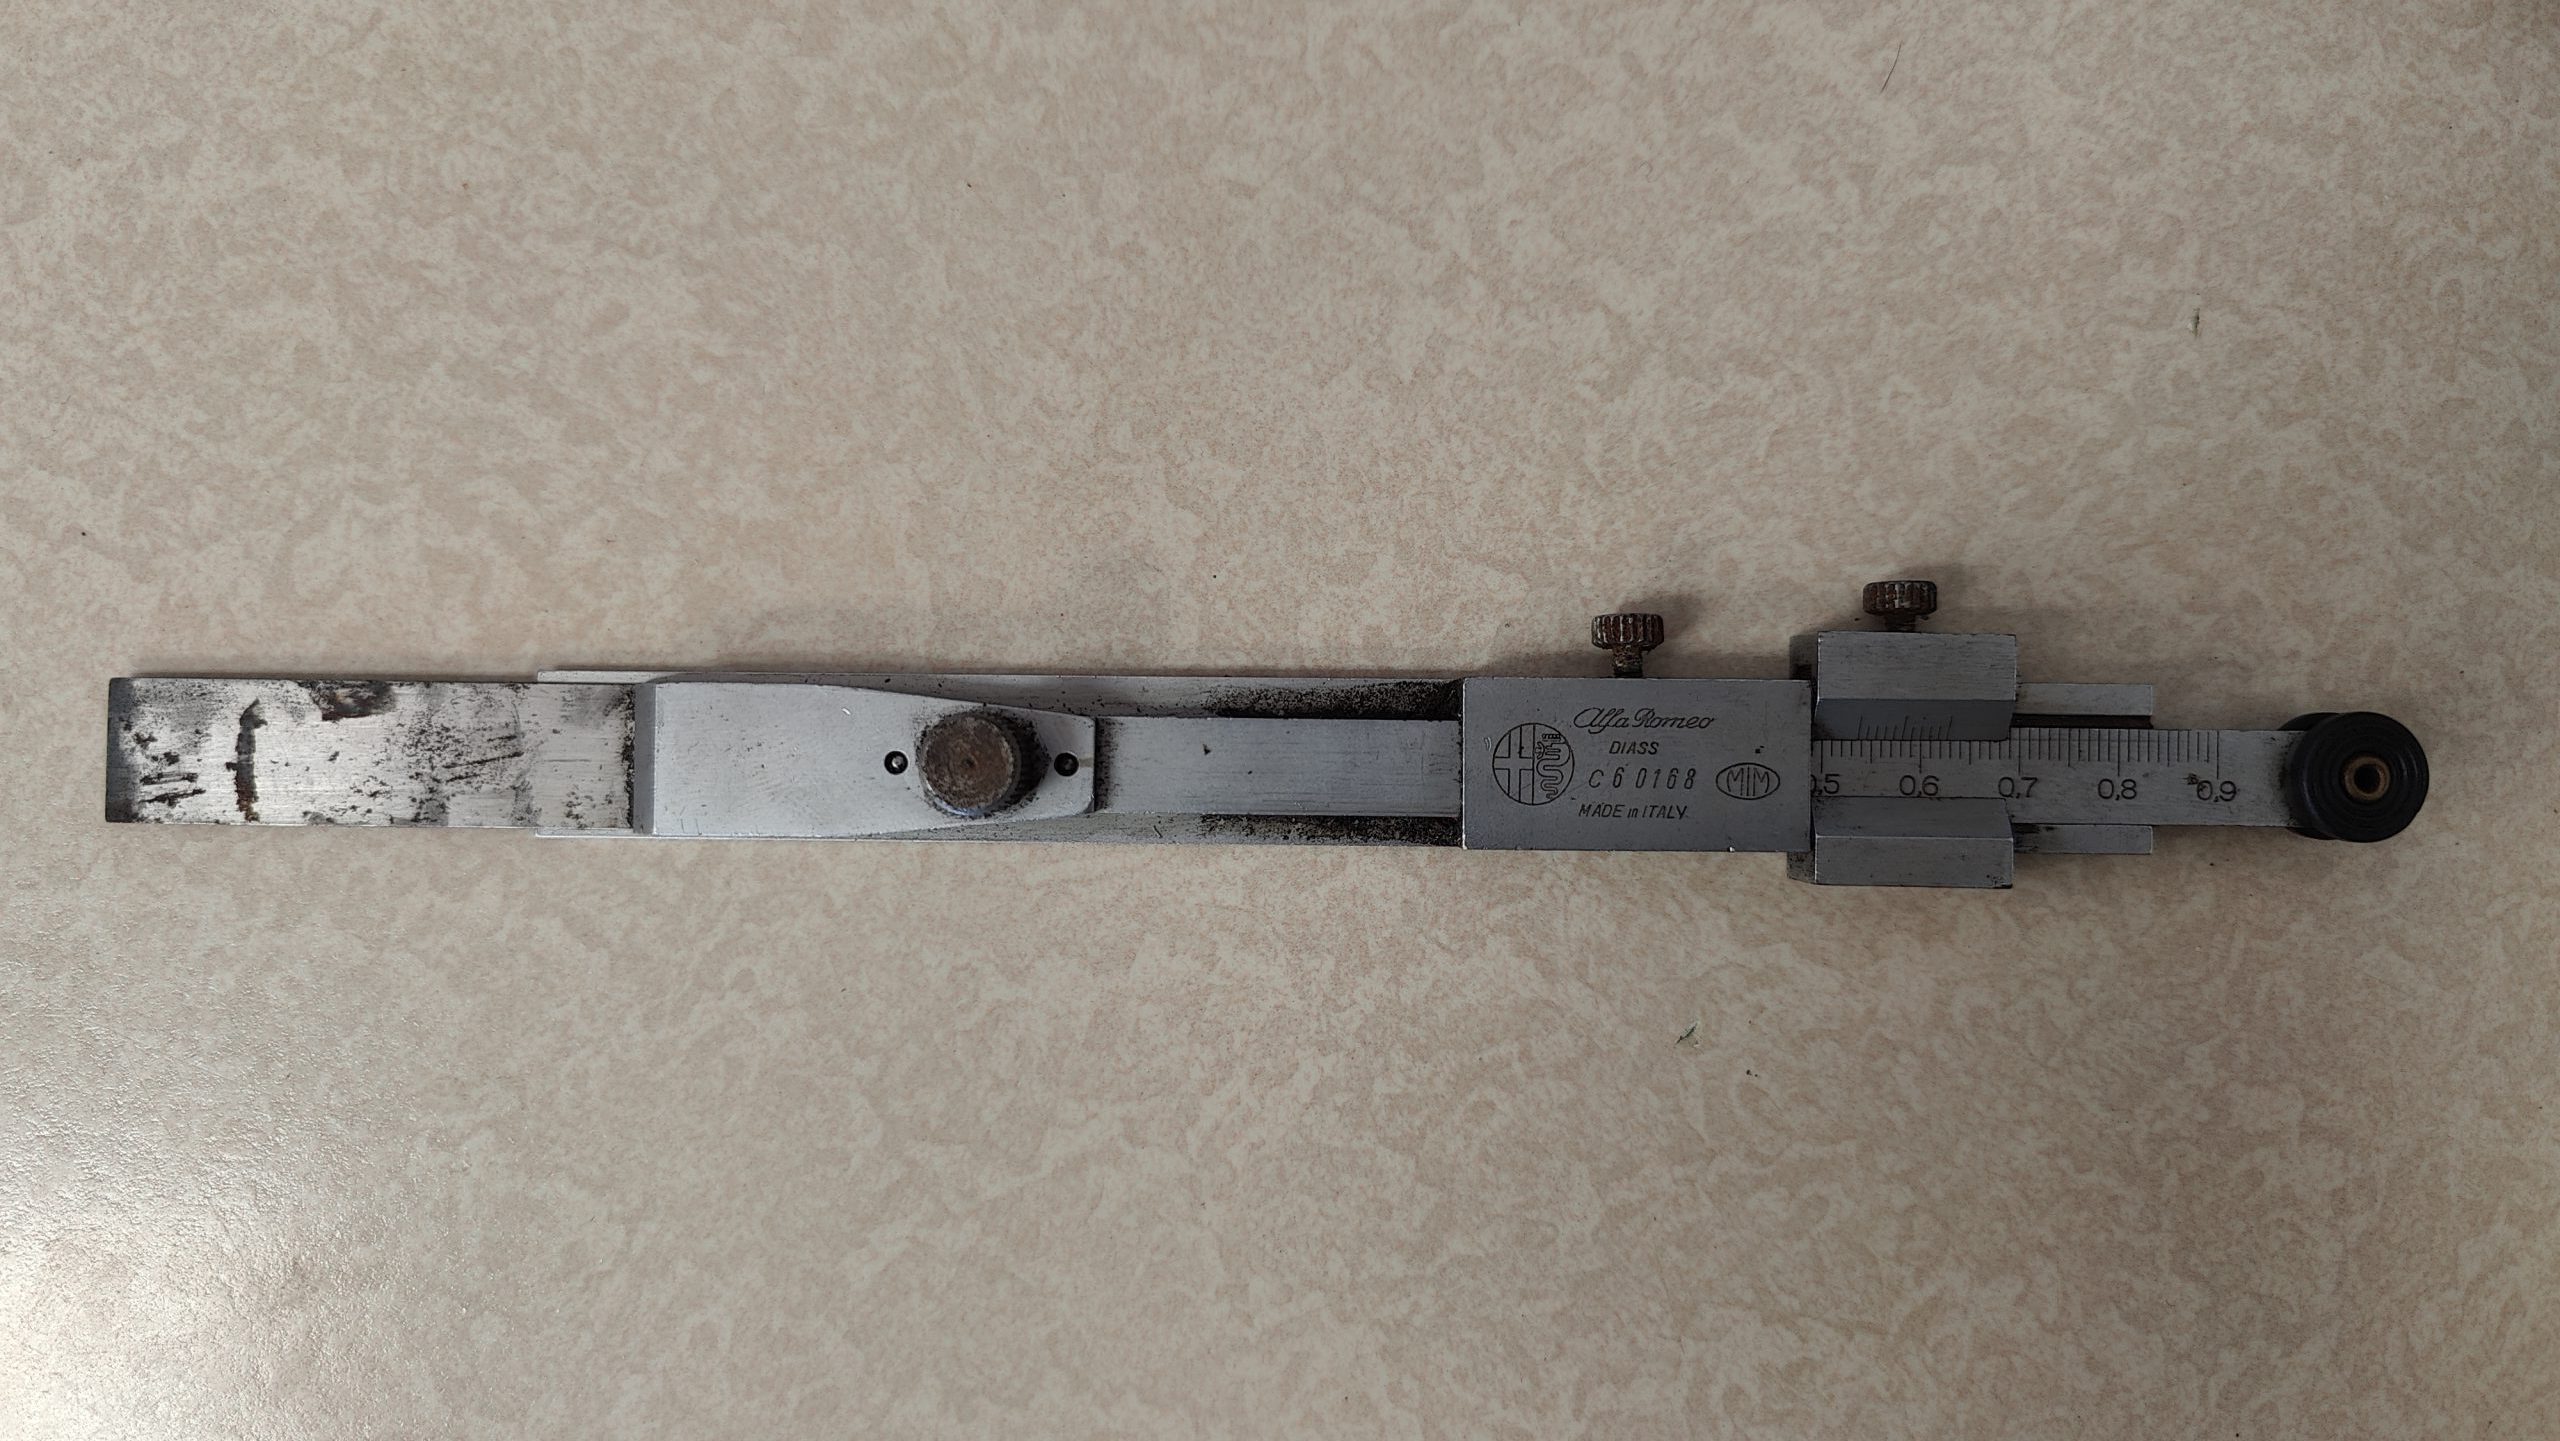
Needless to say this means I’ve been coming across a lot of older tools I had forgotten I have. One of the most intriguing ones was an Alfa Romeo special tool which was gifted to me somewhere around 1990.
At the time I worked in an Alfa Romeo dealership — it was only a dealer for a brief period — not that it was the fault of the workshop it was brief, Alfa at the time was going through an identity crisis and FIAT didn’t seem quite sure what to do with it. But for me it was probably the most enjoyable period of my early apprenticeship. Alfa’s at that time were still exciting.
Identifying the tool
Anyway, on to the tool. When I was first given it, no one knew exactly what it was for. It was in a drawer in an old long forgotten dealership which was now getting an overhaul and taking on one of the more mainstream brands.
If I remember correctly at the time most guesses cited it as a depth gauge for inboard brake systems which were still being used on some Alfas — like the Alfa 75, rear brakes were mounted onto the rear axle/gearbox — But this wasn’t the case.
Alfa Romeo Manufacturer Special Tool DIASS C 60168
I’ve been trying to tolerate Automattic’s Jetpack plugin, and the whole connecting me to the larger WordPress world out there while still self-hosting my website and using my own — basic but mine — themes.
The problem is it just doesn’t work. Well not for me. It’s bloated. It’s slow. It doesn’t connect all the time. I don’t gain any of the small benefits of having a wordpress.com account. And they are only small benefits. For instance your website will rarely if ever show up in their feeds — no matter what you do.
So it’s gone. Jetpack has now been eradicated from my websites. Frankly all I used it for was comments, a like button and some sharing buttons. Now I’ve built my own set of these. It’s lighter, does the same job and it’s mine.
Enshittification
Which neatly creates a beautiful segue into my point, enshittification, also known as platform decay — or basically not getting the same experience from a product or service that you may have gotten previously.
I wanted a real-time booking system for my website — something that would talk to a live calendar and show available slots in my workshop on the fly.
Running my sites on WordPress means having access to a massive plugin ecosystem. But while there are plenty of off-the-shelf booking tools I could have shoehorned into place, I hated the compromises they forced on me. They were either bloated, rigid, or didn’t handle data the way I wanted.
The only real solution was to build one from scratch — right now, I have the luxury of time while preparing to open my new workshop. Ordinarily taking on a project like this wouldn’t have been an option.
What’s the goal?
My requirements were straightforward, a customer should be able to book their vehicle in for a service or repair seamlessly, without needing to pick up the phone. They should automatically receive a confirmation email, complete with a secure link to make amendments or cancel if circumstances change.
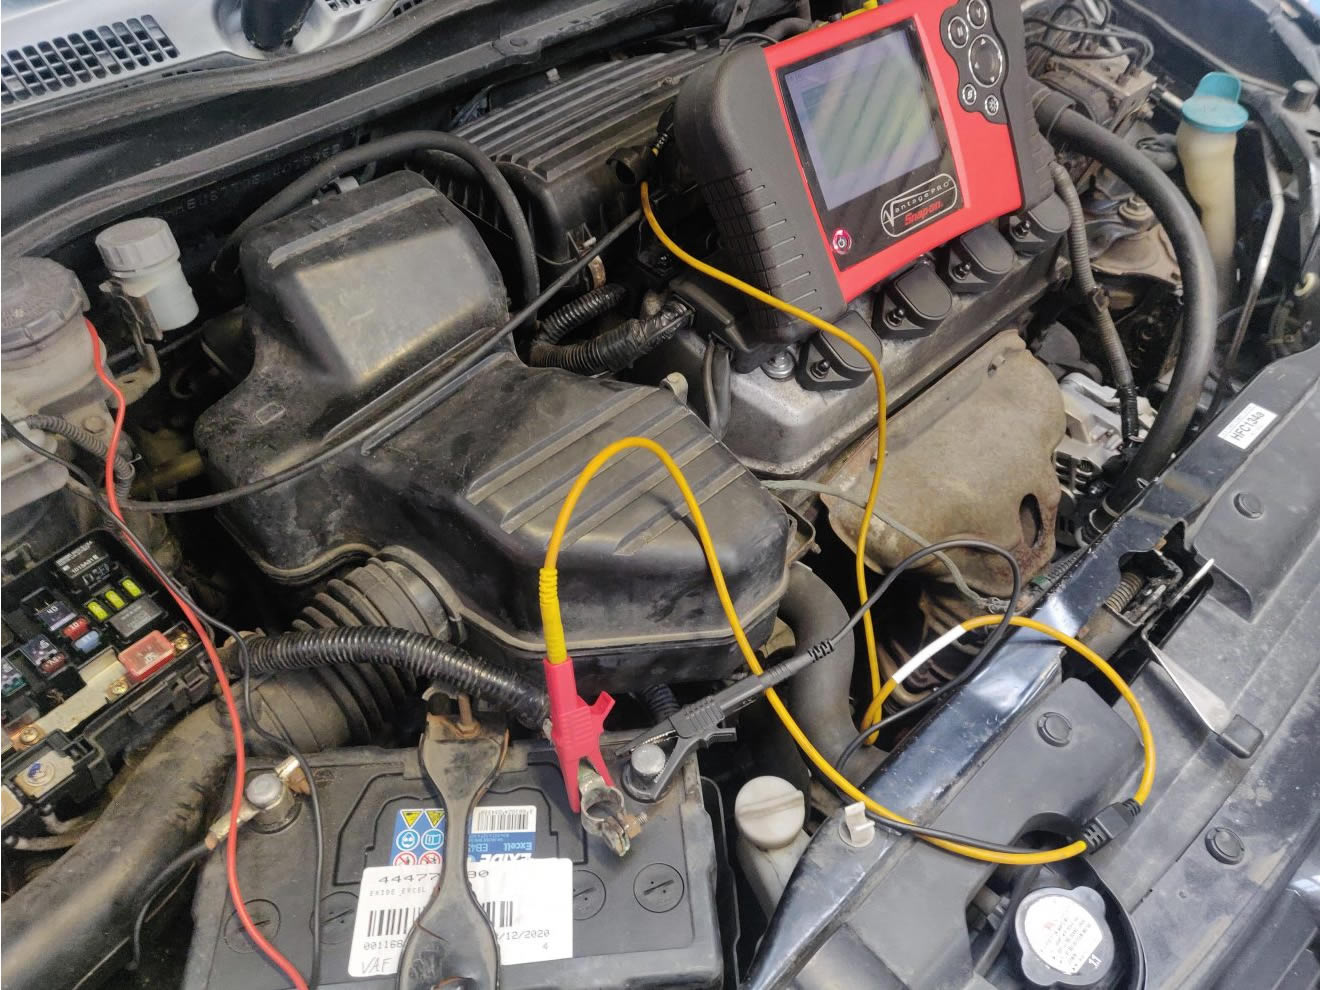
This is a story about a Honda Civic with a parasitic battery drain that would deplete the battery to below eight volts in about two days. That’s a massive drain!
Attempts by other workshops to fix the problem were ineffective — real shot in the dark stuff to be honest — including installing a larger battery, randomly disconnecting lights and other accessories, and disconnecting the battery when the car was left idle for an extended period. And showing the customer how to do this so they could still use the car (insert rolling eyes emoji)
Oddly, no one performed a parasitic drain test with an ammeter to pinpoint the faulty component.
Initial Testing
The first step was to verify the customer’s complaint. I carried out a health check on the battery, which it passed – it was new. Then I checked the draw using a clamp meter to see what level of current I was dealing with. This isn’t the most accurate test, but it told me the size of the draw.
The draw on the battery was around 300 mA, which is quite substantial and should be easy enough to find. But as I continue testing, I noticed that the draw was intermittent. That can make it a little trickier — and maybe why previous attempts were unsuccessful.
Getting some real readings
At this point I connected an inline ammeter on the positive battery terminal. I used the Snap-On Vantage Pro because it has an amp graph — which I like — and it has a mini 10A blade fuse in case I turn the ignition on or whatever and pull too many amps — it’s easier to change this fuse than on other tools I own so I like the set up.
I noticed the 300 mA draw would come and go, so using a graphing meter can be helpful to show a full trace and if there’s a rhythm to the on/off or is it just a fault with no repetition. This method also allows me to lengthen the timebase and see what’s happening over a long period.